 |
I got two CreatiVision consoles for repair... |
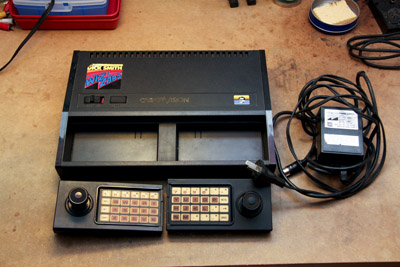 |
The first one is a Dick Smith Wizzard from Australia.
Dick Smith simply relabeld the CreatiVision with their own stickers.
|
 |
Here with the face of Dick Smith... |
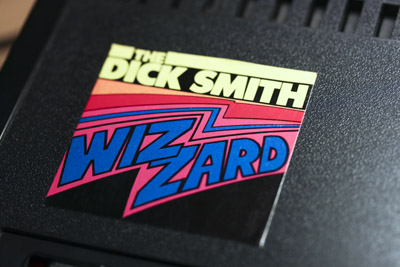 |
and the Wizzard label. |
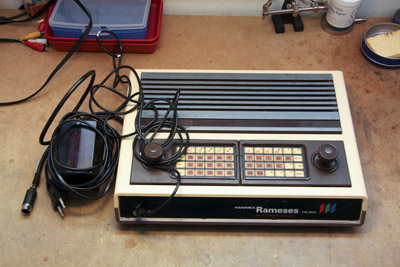 |
The second CreatiVision Console is a Hanimex Rameses. The same hardware put in an other case. Both Creativisions bring no picture on the monitor/tv!
|
 |
First i replaced the Australien plug on one of the PSU´s with an Austrian plug (The voltage in Australia and in Austria are the same!).
Still i got no good output on the PSU...
|
 |
I opend the plug on the console-side and found one broken solderjoint and a great possibility for shortcirquits. So i mounted a new plug.
And i got a working PSU!
This PSU has the following specs:
- 9V AC (red und white)
- 16V AC (yellow und black)
- blue is unused...
|
 |
Next i opend the Wizzard (In spite of all warnings ;-)) |
 |
Dick Smith Wizzard motherboard. |
 |
After a brief optical inspection. I removed, cleaned and reinserted the CPU and the GPU in their sockets. After cleaning the 9929 Chip i got a picture on the screen!
But very unrelieable and erratic, when i touched the Chip colours an the screen changed...
The CreatiVision has really lousy sockets, so i replaced both sockets with new precission sockets and ...
|
 |
The Dick Smith Wizzard is working perfect! |
 |
The Hanimex Rameses brings no picture or only stripes on the screen, but the music of an inserted game was playing! So i thought the processor and a few other things have to work... the main suspect is the 9929 GPU.
|
 |
The Hanimex Rameses has no sockets, well better then bad sockets ... :-) |
 |
I desolderd the 9929 and inserted a socket and a new 9929 (from a TI-99/4A). |
 |
Now i got a picture, but with stripes and many other defects. This looked very much like one of the ramchips ... |
 |
I quickly found the one dataline, that waas stuck at zero on the second ramchip from the left!
ramchip removed, socket added and new Ram inserted and: Still the same!
Then i found out, that a screw, that holds the motherboard in place shorted the dataline to ground!!!!! In this picture the "bad" screw is removed, but if you look you can still see a small area, where the screw touched the groundplane and the dataline above.
ARRGHHHH!
|
 |
Now the Hanimex Rameses is working!
On all 4 controllers a lot of keys where not working.
|
 |
I disassembled the controllers, cleaned the contacts on the foils and the small PCB. |
 |
And i repainted missing traces... |
 |
with silver conductive paint. |
 |
Now all the keys are working again. |
 |
That only leaves one defect PSU. ...with no output at all.
So i had to rewind the transformer.
The first metal parts where very hard to remove.
|
 |
then it got easier, using a cutter-knife to loosen one sheet of metal after the other. |
 |
Until i finally had access to the primary and the secondary windings. |
 |
On the primaryside there is a "heatfuse" and it is burned. As the fuse is under the windings, i had to unwind the primary winding. |
 |
1500 winsings of 0,2mm copperwire unwound by hand (nearly 150m). |
 |
i replaced the fuse... |
 |
And then i built a small winding-station out of a metal coat hanger... After that i also rewound the two secondary windings, as they had a short somewhere (138 windings 0,4mm und 83 windings 0,8mm).
I reinserted the small transformator sheets again and fixed them with superglue.
Now the PSU is working again!
|